
Greetings to you all from another beautiful day in sunny San Diego! Today, we’re looking at a forecast of 75 degrees and sunny and a week of temperatures edging towards 80. As an avid cyclist who hits the pavement on a daily basis, I’m not complaining!
Today’s post will teach you and go through the steps of how to change a bicycle pedal. The inspiration for this post comes from a recent experience I had while riding last week. Due to the amount I ride, my pedals began showing wear and tear. For safety and aesthetic purposes, I decided to order new pedals and replace them myself.
In addition to knowing how to switch out old pedals, it’s important to know how to change a bicycle pedal when you travel with your bike. Many bicycles need to be disassembled, including removing the pedals, in order to fit inside a travel case or be stowed on an airplane. Therefore, learning the following steps and keeping this post bookmarked would be a smart thing to do for the beginning cyclist!
Below, I will share with you the 3 steps of how to change a bicycle pedal.
How to Change a Bicycle Pedal
Step One: Get Your “Bearings”
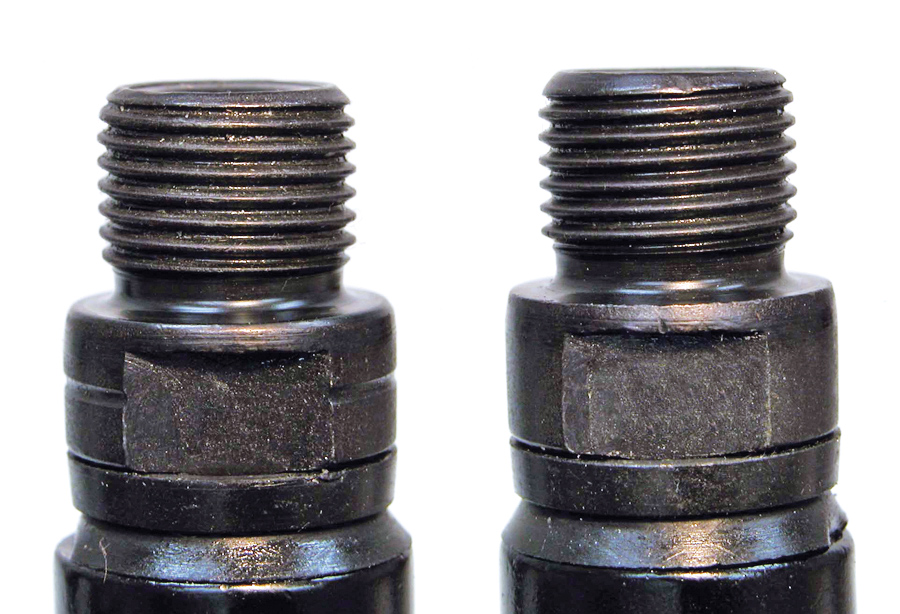
Before changing a bicycle pedal, you must orient yourself with your bike. Recognize that pedal threads are different on the left and right sides. The right pedal has a right-hand thread (removes counterclockwise, installs clockwise) and the left pedal has left-hand thread (removes clockwise, installs counterclockwise). I always remember that the chain always resists tightening the pedal in order to get this straight. Many pedals are actually stamped with an “L” or an “R” to help you stay attuned. Another thing to remember is that the thread will appear to slope upwards towards its tightening direction. See the photo below wherein the left threads slope to the left and the right threads slope to the right.
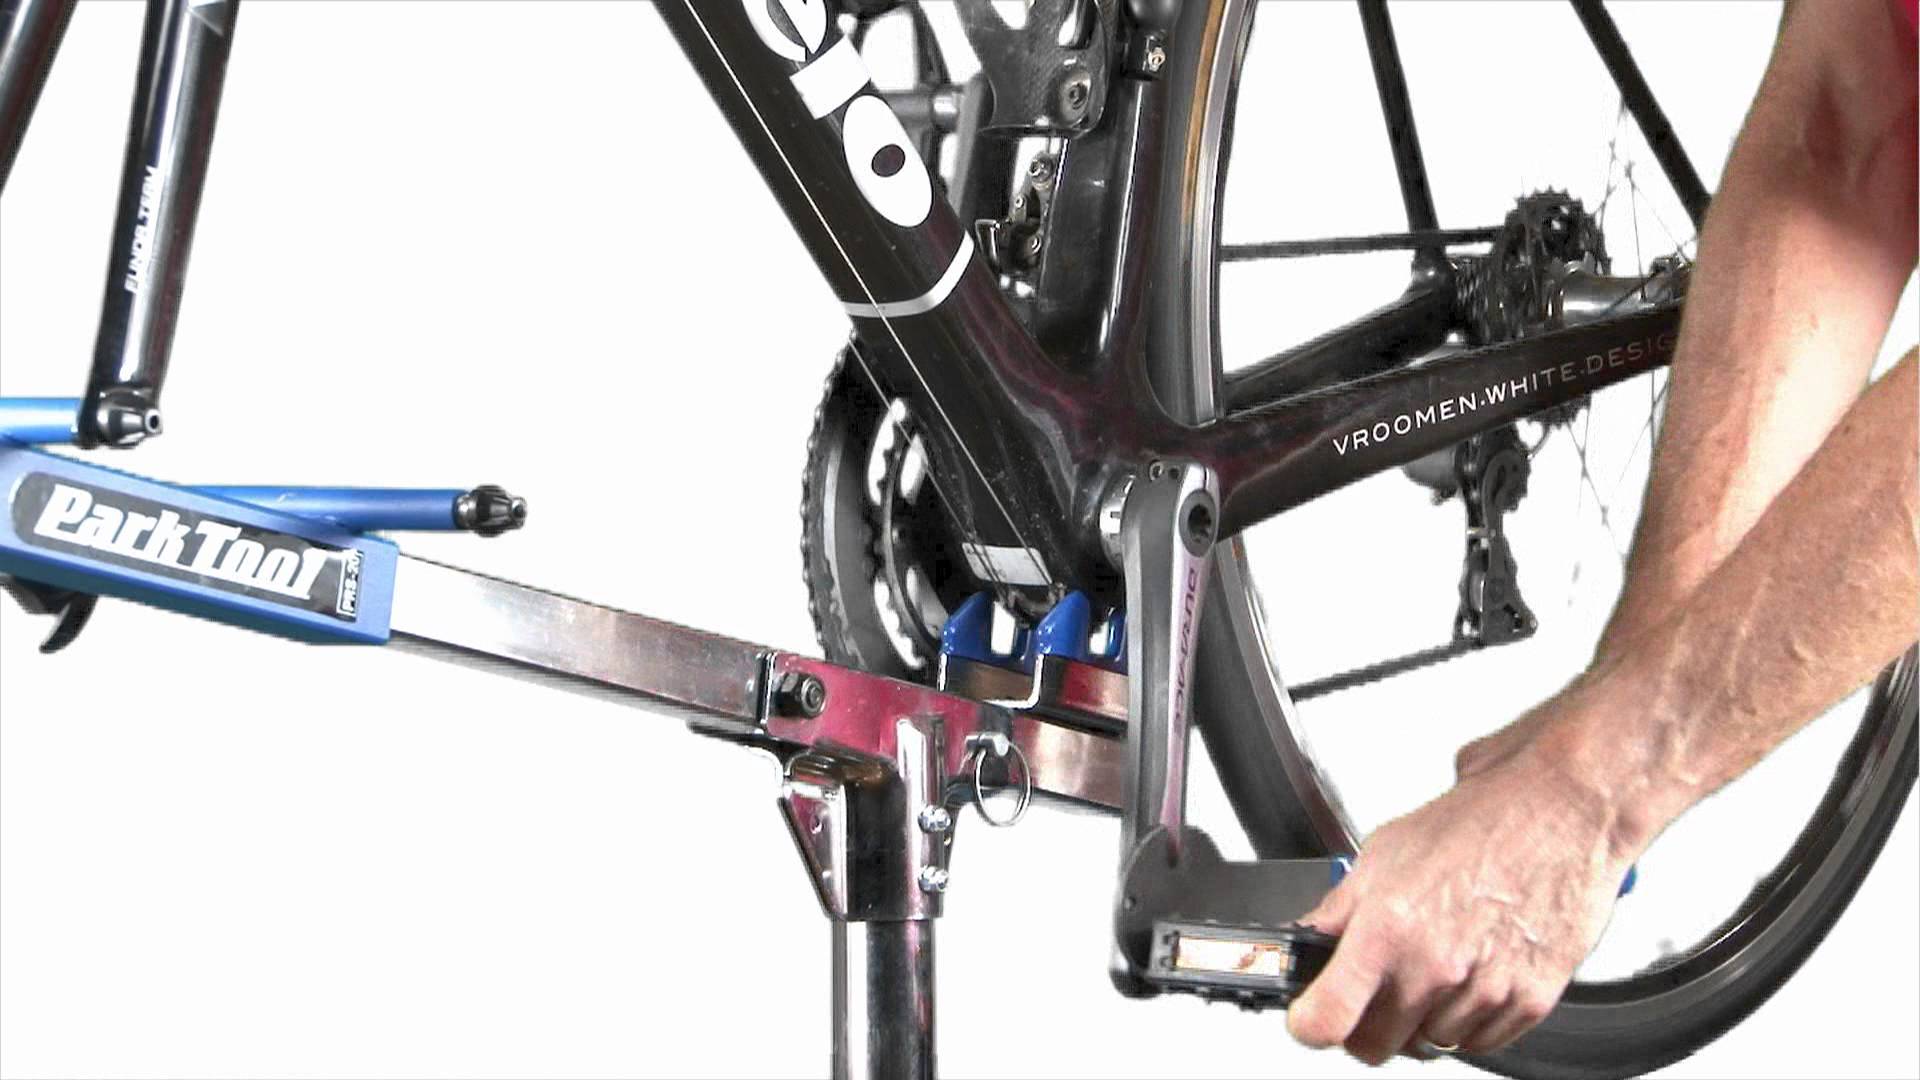
Step Two: Remove the Pedal
First, you must mount your bike or get it into an upright position so that you can shift to the largest chainring. Next, rotate the bike until you can easily access the right pedal. At this point, try different wrench positions until the wrench and crank arm form an angle of 90 degrees or less. If you can, grab the opposite crank lever for a second lever and turn the pedal wrench counter-clockwise and remove the pedal completely from the crank. Rotate the bike until you can easily access the left pedal. Then, position the pedal wrench onto the left pedal and grab the right crank for a second lever. Turn the pedal wrench clockwise to remove the left pedal.
A good tip put forward by www.parktool.com recommends:
“Some model and makes of pedal do not use a pedal wrench flat. These pedals will typically have a 8mm hex fitting in the back side of the pedal thread. Use an 8mm hex wrench in this fitting to remove and secure the pedals. When turning the pedals, keep in mind the wrench is on the back side of the pedal. The pedal thread direction has not changed, but the appearance of the wrench turning “clockwise” or “counter-clockwise” will appear different. View the wrench from the orientation of the pedals, standing to the right side of the bike for the right pedal, and the left side of the bike for the left pedal. Turn the wrench accordingly.”
Step Three: Install the Pedal
Identify the left and right pedals once again by looking for the “L” and “R” marks. Use the threads as shown in the photograph above if you can’t locate these marks. Then, grease the threads of both pedals. Use your fingers to thread the right side pedal into the right crank. Use your wrench to snug the pedal. After that, hold the wrench with one hand and hold the opposite crank with the other. Use the opposite arm as a second lever and tighten the pedal. Repeat the same process for the left pedal (don’t forget to thread counter-clockwise instead).
One more piece of advice from www.parktool.com shares:
“If pedal is difficult to thread into arm, or if the threads in the crank are damaged, there may be some repair possible by chasing them with a tap. For 9/16” x 20 tpi pedals, use tap set TAP-6. For 1/2” x 20 tpi pedals, use tap set TAP-3. Taps will align damaged threads, but will not restore metal that is simply removed. If no threads are left, have a professional mechanic install a pedal bushing kit.” 
Final Notes
Pedal bearings and hardware are worth a mention before signing off on this post. Pedal bearings may be serviceable depending on the manufacturer and model of the pedal. Service tools are also available depending on the brand of your pedals. Some pedal models aren’t meant to be serviced and are ridden until the pedal simply wears out. Pedal bearing services usually are best left to professionals.
And voila! That’s all you need to know.
Best of luck, fellow riders!